
The Secret to Placing Tiles Accurately: Using the Right Tools for a Perfect Finish
At Pacific Coast Construction, precision is at the heart of every tiling project we take on. Whether we’re installing tiles in a spacious kitchen, a cozy bathroom, or a complex layout with intricate patterns, we know that accuracy is key to achieving a professional, long-lasting finish. The secret to getting it right every time? It’s all about using the right tools for tile installation.
Why Precision Matters in Tiling
Tiling is not just about laying pieces in place; it’s about creating a seamless, durable surface that enhances the aesthetics of a space while standing the test of time. Even a slight misalignment can create uneven joints, cause tiles to shift, or leave gaps that weaken the entire installation. That’s why precise placement is essential for:
- Aesthetic appeal: Crooked or misaligned tiles can be an eyesore.
- Durability: Properly aligned and leveled tiles are more likely to last without cracking or shifting.
- Safety: Uneven tiles can create tripping hazards or cause water to pool in certain areas.
With this in mind, our team uses a range of specialized tile installation tools and techniques to ensure flawless results.
The Essential Tools for Accurate Tile Installation
Here are the key tools we use to ensure each tile is perfectly placed:
1. Tile Spacers
One of the most important aspects of tile installation is maintaining consistent spacing between tiles. Uneven gaps not only look unprofessional but can also lead to poor grouting and structural issues over time. We use tile spacers to guarantee equal distance between each tile, ensuring uniform grout lines for a clean, polished look.
Tile spacers come in various sizes depending on the desired grout line width, and we select the appropriate size based on the tile type and design pattern.
2. Tile Cutter
Cutting tiles to fit corners, edges, or around fixtures is an inevitable part of any tiling project. Using a manual tile cutter or an electric wet saw allows us to make precise cuts without chipping or cracking the tiles. We take our time to measure and cut each tile accurately, ensuring a snug fit in even the tightest spaces, whether it’s around a sink or in an oddly shaped corner.
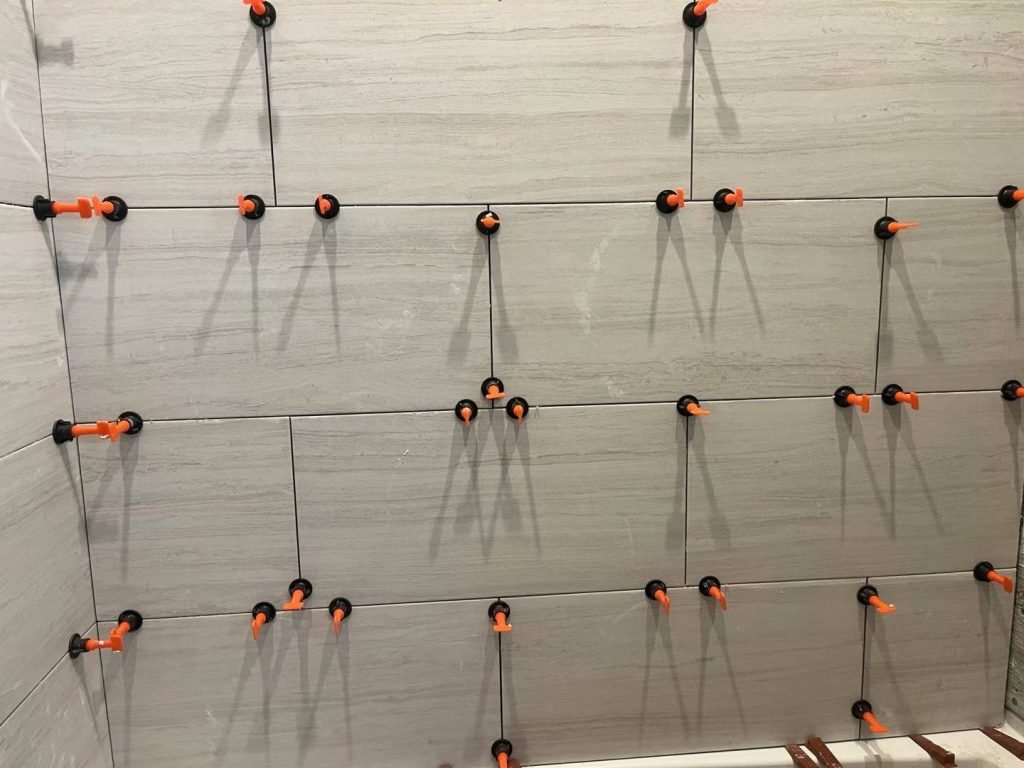
3. Tile Leveling System
Uneven tiles, known as “lippage,” can ruin the look and functionality of a tiled surface. To prevent this, we use a tile leveling system—a set of clips and wedges that ensure each tile sits perfectly flat and level with its neighbors. This tool is especially important for large-format tiles, where even the slightest discrepancy in height can be noticeable.
4. Trowels and Notched Trowels
Applying adhesive evenly is key to ensuring that each tile adheres properly to the surface. We use notched trowels to spread the adhesive in a consistent layer, creating ridges that allow for maximum coverage and a strong bond. The size of the trowel’s notches is tailored to the type of tile and the surface we’re working with, ensuring the adhesive grips the tiles firmly without excess or voids underneath.
5. Spirit Level
To ensure that the entire surface is perfectly level, we use a spirit level throughout the installation process. This tool helps us double-check that the tiles are perfectly aligned and flush, preventing any areas from being too high or too low, which can lead to uneven surfaces or water pooling in bathrooms and kitchens.
6. Grout Float and Sponge
Once the tiles are placed and the adhesive has set, grouting is the final step in the process. We use a grout float to apply the grout evenly, pushing it into the spaces between tiles to ensure a firm, consistent seal. Afterward, a damp sponge is used to wipe away any excess grout and polish the surface, leaving a smooth, professional finish.
Our Process: How We Place Tiles with Accuracy
Here’s a step-by-step look at how we tackle tile installations to guarantee a perfect result:
1. Surface Preparation
Before we start tiling, we make sure the surface is clean, dry, and properly prepared. This includes leveling the substrate if needed and applying a suitable primer to ensure the adhesive bonds well with the surface.
2. Laying Out the Tiles
We begin by dry-laying the tiles, which means arranging them without adhesive to map out the design and cuts. This allows us to ensure the layout is symmetrical and aesthetically pleasing. We make adjustments as necessary before applying the adhesive.
3. Applying Adhesive and Positioning Tiles
Using the appropriate notched trowel, we apply the adhesive evenly across the surface. We then carefully place each tile, using tile spacers and a leveling system to ensure consistent spacing and perfect alignment. Throughout the process, we use a spirit level to make sure the tiles are sitting flat and even.
4. Cutting and Fitting
For edges, corners, and obstacles, we carefully measure and cut the tiles using a tile cutter or wet saw. Each piece is custom-cut to fit perfectly, ensuring that there are no gaps or uneven edges.
5. Grouting and Finishing
Once the tiles are set, we apply grout between the joints using a grout float. After allowing the grout to cure, we clean the surface with a sponge, leaving the tiles polished and ready to use.
Why Choose Us? Precision and Affordability You Can Trust
At Pacific Construction, we understand the importance of precision in tiling. That’s why we use the right tile installation tools and take the time to do it right. Our rates remain competitive, allowing you to get top-quality results without overspending.
Here’s why clients choose us for their tiling projects:
- Expert craftsmanship: Our attention to detail ensures flawless results, even in complex or large-scale installations.
- Cost-effective service: We deliver high-quality installations without the high price tag.
- Long-lasting durability: Our careful process ensures that your tiles will stay perfectly in place for years to come.
- No hidden fees: We’re upfront about our pricing, so you’ll never be surprised by additional costs.
Conclusion: Need Tile Installation? We’ve Got the Tools and Expertise for a Perfect Job
When it comes to tiling, precision is everything. At Pacific Coast Construction, we use the right tools and techniques to ensure every tile is placed perfectly, no matter how challenging the layout. Contact us today for a free consultation, and let us show you how we can deliver stunning results at a price that can’t be beaten.